
Connect Zime to Claude
Zime is listed in Claude's directory. Connect it once and ask about your deals, calls, objections and pipeline in plain language, with answers pulled live from Zime. No API key: you sign in with your Zime account and see only what you already see in the dashboard.
Connect Zime (everyone)
Two minutes. Works on Claude Web and Claude Desktop.
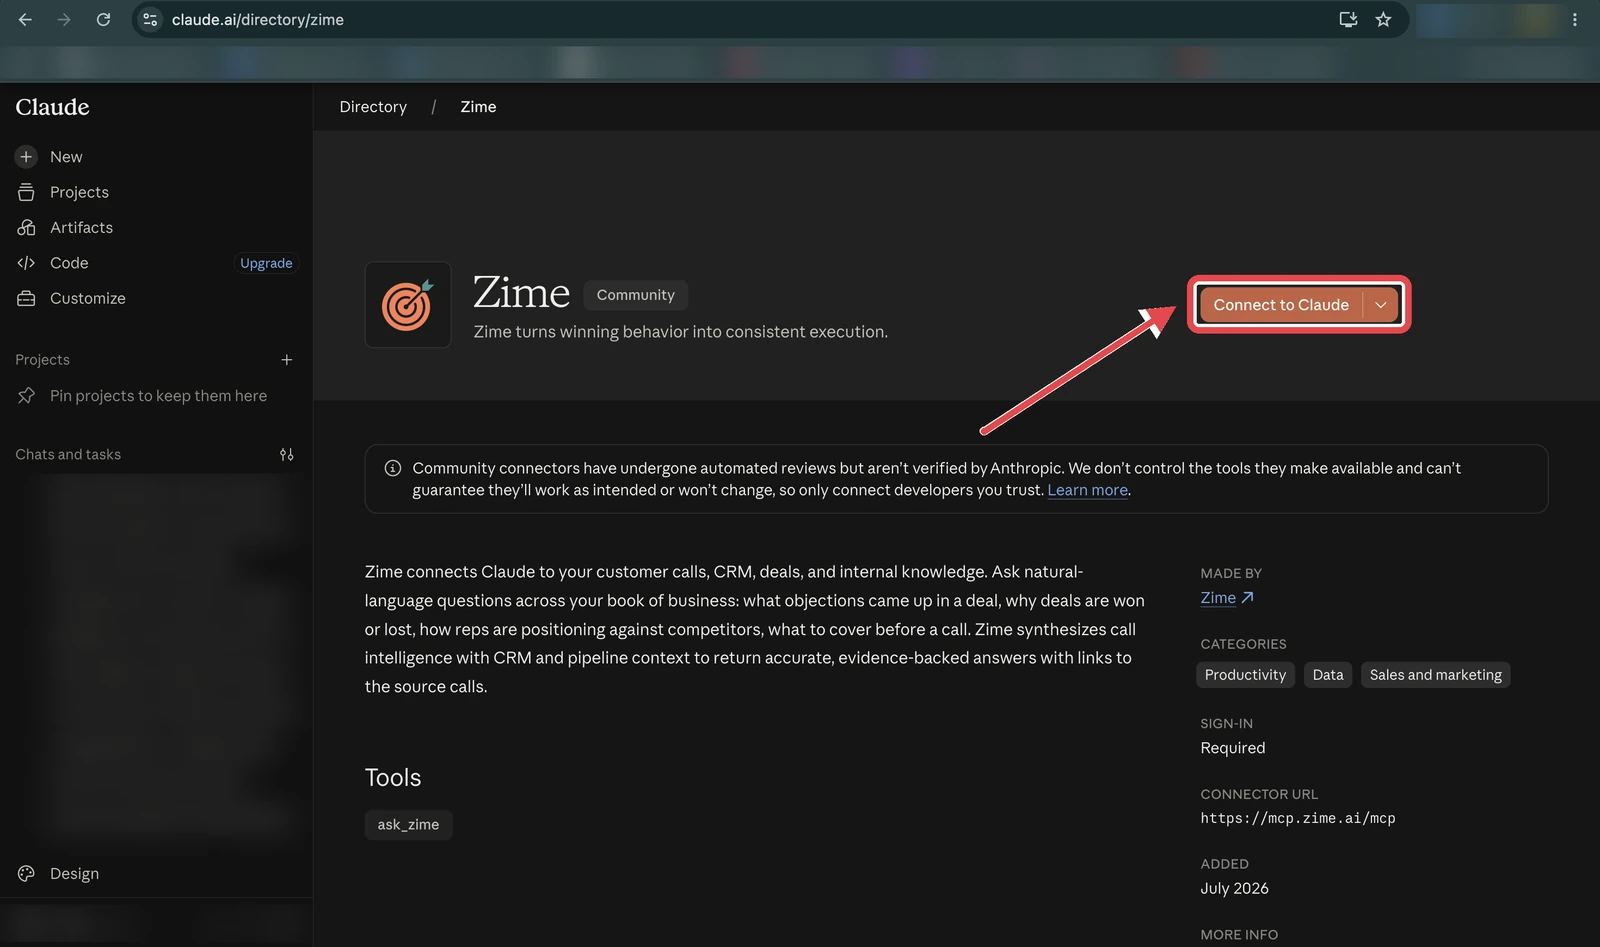
Go to claude.ai/directory/zime while signed in to Claude.
Click Connect to Claude. A Zime sign-in opens in your browser; use your work email. When it finishes, the button turns into a Connected badge.
Start a new chat and ask away. If Zime does not answer, click + at the bottom-left of the chat, hover over Connectors, and enable Zime.
Team and Enterprise: the Owner goes first
On Team and Enterprise plans, a workspace Owner adds Zime for the organization once. After that, every member connects with the steps above.
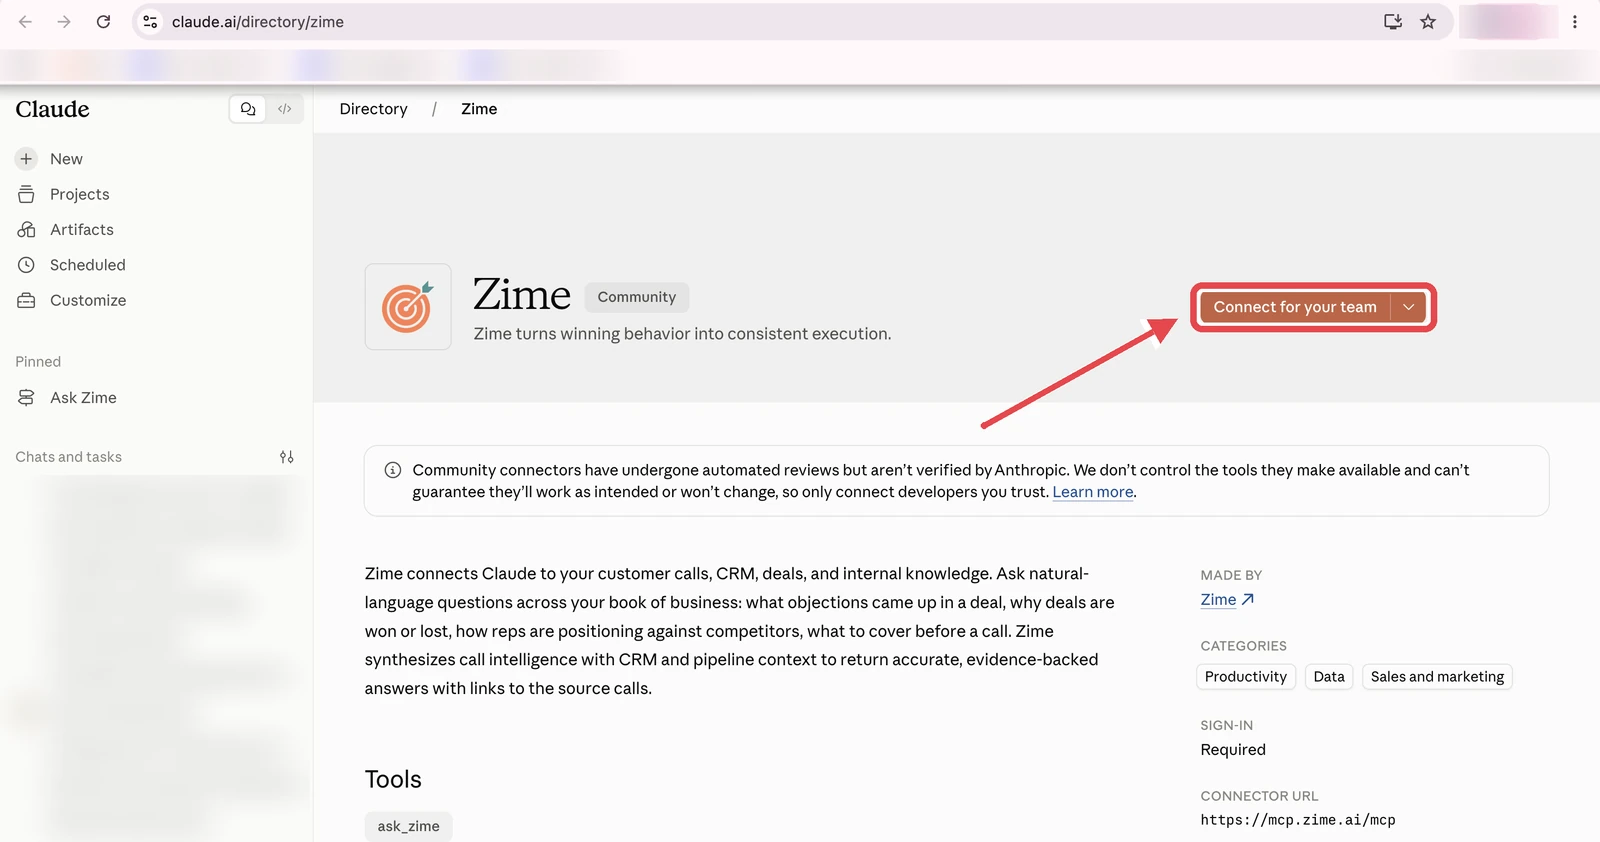
Go to claude.ai/directory/zime. Owners see Connect for your team instead of Connect to Claude.
That makes Zime available to everyone in the workspace. It does not sign anyone in: each person still connects with their own Zime account.
Send them this page. They open the listing, click Connect to Claude, and sign in.
Other AI apps
Any assistant that supports MCP can connect to Zime as a custom connector.
https://mcp.zime.ai/mcp (the /mcp at the end is required).
Name it Zime and paste the URL. Leave every other field blank.
A Zime sign-in opens in your browser. Use your work email, then ask it about your deals, calls and accounts.
What you can ask
- "What objections came up in my calls last week?"
- "Which deals in my pipeline are at risk, and why?"
- "Find the call where we discussed pricing with Acme."
- "What should I cover before tomorrow's call?"
Answers use credits. If you want the same data in bulk without credits, the REST API is free and consumes none.
Security & privacy
- No API keys. You sign in with your normal Zime login.
- Your data only. The same per-user access rules as the Zime dashboard, even on a team connection.
- Sessions expire like any web session. You are simply asked to log in again.
Frequently asked questions
I am on Claude Team or Enterprise and do not see a Connect to Claude button.
On Team and Enterprise plans a workspace Owner adds Zime for the organization first. Ask your Owner to open the Zime listing in the Claude directory and click "Connect for your team". Once they have, open the same page yourself and click Connect to Claude.
Does adding Zime for the team give everyone access to my data?
No. Adding it for the team only makes Zime available. Every person signs in with their own Zime account and sees exactly what they can already see in the Zime dashboard.
The connector worked, then stopped. What happened?
Your Zime session expired, exactly like a normal web session. Ask Zime anything in Claude and it will prompt you to log in again.
The login window does not open on Claude Desktop. What do I do?
Fully quit and reopen Claude Desktop, then click Connect again.
I use an AI app other than Claude. How do I connect?
Add Zime as a custom connector using the connection URL https://mcp.zime.ai/mcp, including the /mcp path at the end, then approve access in the browser window that opens.
Does the MCP connector use credits?
Answers use credits. The REST API is the free surface: it consumes no credits at any volume, and returns calls, deal and account context, and transcripts in bulk.
Can I get Zime's full deal intelligence through the API?
Through MCP, yes. The REST API is a record layer: calls, deal and account context, and transcripts in bulk on a stable contract. The MCP connector runs on the Sales Brain with your playbook and context graph loaded, so it reasons over a call instead of reading rows out of it.
Need raw data instead of an assistant? The Zime REST API serves the same calls, insights and transcripts for your warehouse or in-house tooling. Building your own agents? See MCPs for In-House Agents.